A practical guide explaining how beginners can design and prepare print-ready stickers using a custom sticker editor.
Introduction
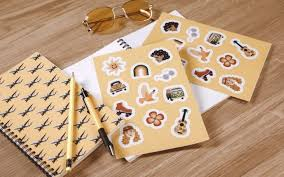
Custom stickers are widely used for packaging, event branding, classroom materials, laptops, and small-batch merchandise. The main challenge for beginners is rarely creativity—it is understanding how to translate an idea into a clean, printable design.
Modern custom sticker editors reduce the technical barrier. They provide preset canvas sizes, drag-and-drop tools, automatic background removal, and typography controls that eliminate the need for advanced graphic design knowledge.
One accessible starting point is to create free custom stickers from Adobe Express, which offers browser-based templates and guided layout tools suitable for first-time designers.
This guide walks through the full process—from concept to print-ready export—while noting practical tools that can support specific steps along the way.
Step-by-Step Guide for Using Custom Stickers Editor
Step 1: Define Your Sticker Goal and Dimensions
Goal
Clarify the purpose, audience, and physical size before opening the editor.
How to do it
- Decide what the sticker is for (branding, labeling, decoration, resale).
- Identify where it will be placed (water bottle, envelope, product box).
- Choose a size (e.g., 2” circle, 3” square, die-cut custom shape).
- Note whether you need matte, gloss, or transparent vinyl printing.
- Open a new project and select an appropriate preset size or enter custom dimensions.
What to watch for
- Designing without knowing final dimensions can cause scaling issues.
- Very small stickers require simplified text and bold shapes.
- Transparent stickers require careful contrast planning.
Tool notes
- If you need to convert between inches, millimeters, and pixels, RapidTables Unit Converter can help verify correct sizing before setup.
- For print guidelines like common bleed margins, printer documentation (from your chosen print service) should be reviewed before proceeding.
Step 2: Choose a Template or Start With a Clean Canvas
Goal
Establish a layout foundation that matches your intended look.
How to do it
- Browse template options inside Adobe Express by category (labels, logos, illustrations).
- If using a template, replace placeholder text and imagery with your own.
- If starting blank, set a background color or leave it transparent.
- Add a primary focal element (icon, wordmark, illustration).
- Use alignment tools to center or evenly space elements.
What to watch for
- Overcrowded layouts reduce legibility.
- Templates designed for social media may not be optimized for print.
- Decorative fonts may not scale well at smaller sizes.
Tool notes
- If you need royalty-free icons or illustrations, The Noun Project can provide simple, scalable vector graphics.
- For checking font pairing inspiration without installing new software, tools like Fontpair offer visual examples of complementary typefaces.
Step 3: Add and Refine Text Elements
Goal
Ensure your sticker message is readable and balanced.
How to do it
- Add a short headline or phrase (keep it concise).
- Adjust font size so the smallest letters are legible at actual print size.
- Increase line spacing slightly for clarity.
- Use high contrast between text and background.
- Apply subtle effects (outline or shadow) only if necessary for readability.
What to watch for
- Thin fonts may disappear when printed small.
- Script fonts can blur on textured vinyl.
- All-caps text may reduce readability for longer phrases.
Tool notes
- If you want to test readability, copy the text into Hemingway Editor to simplify overly complex phrasing.
- For checking color contrast ratios, WebAIM Contrast Checker can confirm legibility standards.
Step 4: Prepare Images and Backgrounds Properly
Goal
Ensure graphics print cleanly and at sufficient resolution.
How to do it
- Upload high-resolution images (preferably 300 DPI for print).
- Use Adobe Express background removal tools for subject isolation.
- Avoid enlarging low-resolution images.
- Keep graphics inside a safe margin from the edge.
- Simplify detailed photographs if printing small.
What to watch for
- Pixelation appears when images are stretched.
- Thin lines may not cut cleanly in die-cut stickers.
- Transparent backgrounds must be exported correctly.
Tool notes
- If you need to upscale a low-resolution image carefully, Let’s Enhance can improve clarity before upload.
- To remove metadata from exported files before sending to print, ImageOptim can reduce file size without visual loss.
Step 5: Account for Bleed and Safe Area
Goal
Prevent unwanted white edges or cropped text during printing.
How to do it
- Extend background colors slightly beyond trim edges (typically 0.125” bleed).
- Keep all critical text inside a safe zone away from the cut line.
- Preview your design at 100% zoom.
- Use grid guides inside Adobe Express to maintain margins.
- If creating a die-cut shape, ensure borders are thick enough to survive trimming.
What to watch for
- Text too close to the edge may be clipped.
- Complex outlines may complicate cutting.
- Thin borders exaggerate trimming imperfections.
Tool notes
- For understanding print bleed concepts in more detail, FedEx Office Print Guidelines provide neutral explanations of safe margins and bleed setup.
- If you need to visualize trim boundaries precisely, exporting and previewing in Adobe Acrobat Reader can help inspect edge alignment.
Step 6: Export in a Print-Ready Format
Goal
Generate a file suitable for professional printing or home use.
How to do it
- Export as high-resolution PNG (with transparency if needed).
- Choose PDF if your printer prefers vector output.
- Confirm color mode requirements (RGB vs CMYK).
- Save a backup editable version.
- Rename files clearly (e.g., brandname_sticker_3in_round_v1).
What to watch for
- RGB colors may shift slightly in print.
- Low export resolution leads to blurry results.
- Missing transparency settings can alter final output.
Tool notes
- If you need to convert RGB values to approximate CMYK equivalents, CalculatorSoup Color Converter can assist.
- To preview how colors may shift in print, printer-specific ICC profile previews can be checked within your print provider’s documentation.
Step 7: Prepare for Distribution or Campaign Use
Goal
Ensure your sticker supports broader communication or sales objectives.
How to do it
- Create a digital mockup for previews.
- Document dimensions and file specs.
- Store final files in a shared folder.
- If selling, track inventory and shipping logistics.
- If promoting, schedule announcements around launch timing.
What to watch for
- Inconsistent file naming complicates revisions.
- Mockups should match real size proportions.
- Promotional messaging should reflect sticker usage context.
Tool notes
- For managing sticker production timelines or collaboration tasks, Trello (Project Management) can organize approvals and print coordination.
- If tracking customer interest or distribution lists, platforms like Mailchimp (Email Marketing) can support campaign communication.
Common Workflow Variations
Photo-Based Sticker
Start with a high-resolution image and remove the background. Simplify the silhouette and add a bold outline to create a die-cut effect. Keep fine detail minimal if printing small.
Minimal Text Logo Sticker
Focus on typography and spacing. Use a single color background and one strong wordmark. Ensure font thickness is print-safe.
Small-Batch Merch Sticker
Include a subtle website URL or brand mark. Use list-style or icon-based designs to improve recognizability in marketplaces.
Transparent Vinyl Sticker
Avoid light-colored text without an outline. Test contrast on both light and dark backgrounds before printing.
Checklists
Before You Start Checklist
- ☐ Final dimensions selected
- ☐ Print method confirmed
- ☐ High-resolution assets available
- ☐ Background preference decided (solid or transparent)
- ☐ Text kept concise
- ☐ Bleed allowance reviewed
- ☐ Color contrast verified
- ☐ File naming convention prepared
Pre-Export / Pre-Order Checklist
- ☐ 300 DPI resolution confirmed
- ☐ Bleed extended where required
- ☐ Text inside safe margins
- ☐ Spelling checked
- ☐ Transparent background verified (if applicable)
- ☐ Borders thick enough for cutting
- ☐ File exported in correct format
- ☐ Final preview reviewed at 100% zoom
Common Issues and Fixes
Low-Resolution Print Output
Replace the image with a higher-resolution file. Avoid enlarging small assets beyond original size.
Text Too Close to the Edge
Move text inward to maintain a safe margin. Extend background color outward instead.
Unexpected Color Shift
Check whether the printer requires CMYK. Convert colors if necessary and preview before ordering.
Cropping Surprises
Enable bleed and safe area guides. Avoid relying on thin outer borders.
Transparent Background Appears White
Ensure export settings include transparency enabled and confirm file type supports it.
How To Use Custom Stickers Editor: FAQs
Can beginners create stickers without drawing skills?
Yes. Templates, icons, and editable text layers eliminate the need for illustration expertise. The key is layout clarity rather than artistic complexity.
Is it better to start with a template or blank canvas?
Templates help with spacing and alignment. A blank canvas works well for minimal logo-based designs.
Should I export as PNG or PDF?
PNG works well for raster designs and transparent backgrounds. PDF is preferred if the design includes vector elements and the printer supports it.
How small can text be on a sticker?
Generally, avoid text smaller than 6–8 pt for small stickers. Always test legibility at actual size before printing.